 |
|
How EXACTLY to make a website
The first thing you will need is an HTML editor; unless you
want to learn HTML code, which is a very difficult task! It's
outdated, but FrontPage Express that came out between
95'-97', is very easy to use; plus it's free.
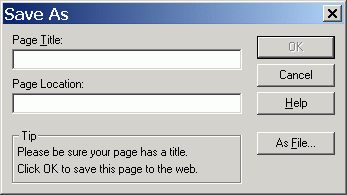
Click "As File"
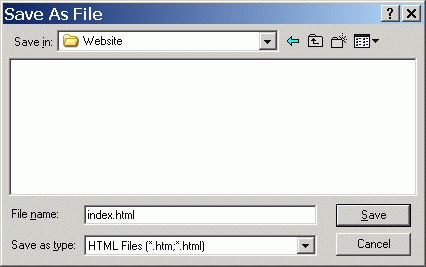
Type in "index.html", even though under that it says
it will be saved as "HTML File (*.htm,".html)",
you should still specify weather it is to be an .htm or .html
extension. Most people use html and not the htm file extension
(Also, I would use all lowercase letters.)
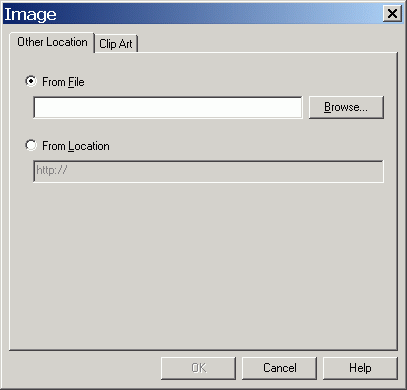
Make sure "From File" is selected, Click on "Browse". A window will come up and then you need to navigate to your "images" folder and select the image you want inserted.
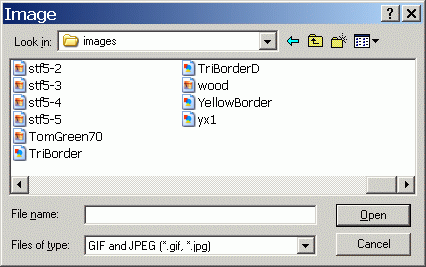
Your selected image should now appear on your page.
Keep in mind, when first inserted, an image will be displayed at
what ever resolution it really is. What I always do is after
inserting an image, I will left click on it and then there will
appear black dots on each side of the image and on all four
corners. Don't mess with the ones on the sides as doing so will
distort the image proportions. Instead, click on one of the
corners and you will find that you can adjust the image size by
doing this. Then after you have adjusted the image to the desired
size, it will look its best if you go into your images folder and
use some kind of image software to adjust the resolution of the
actual image file to match the displayed image size on your page.
Spinwave
is considered to do this pretty well. They sell a GIF cruncher
and a JPG cruncher. The JPG cruncher will work on any image, it
just won't maintain the animation of a GIF image when saving. It
can still be used on non-animated GIF images though. Another
program that is free and works almost as well is Irfanview.
It won't downsize animated GIF images at all though but is free
and does work almost as well as Spinwave in terms of image
quality.
You can find the displayed image size by right-clicking on the
image, then selecting "image properties", then clicking
"appearance".
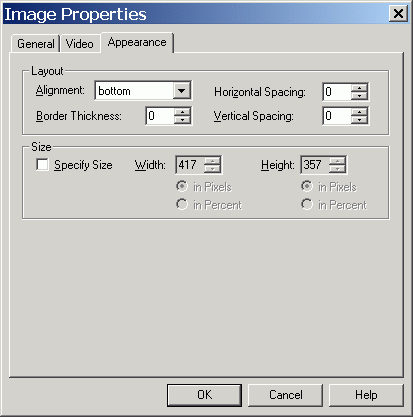
In the above example, it is being displayed at 417 pixels wide
and 357 high. What ever the width and height is, that's what you
need to adjust the image file itself to be. Doing so will
increase the image quality on your webpage, and if you were
working with a very large resolution image that you were planning
on displaying as a wallet sized photo, then the file size of that
image will probably be dramatically reduced, resulting in a very
noticeable increase in download speed for visitors to your
website who are still stuck with dial-up internet service. Tip:
Most image processing software will save image files with either
all capitalized file extensions or all lowercase file extensions.
They seem to just pick which one at random too. To force it to
save in either one, you must actually type it in. Example:
imagename.jpg or imagename.JPG (Save it using what the original
file was as the file path is case sensitive)
Example: The command, <img src="images/Stars.gif",
will not find the image it's looking for if the image has been
renamed to Stars.GIF
Setting a background image: Select "File", "Page
Properties", then "Background".
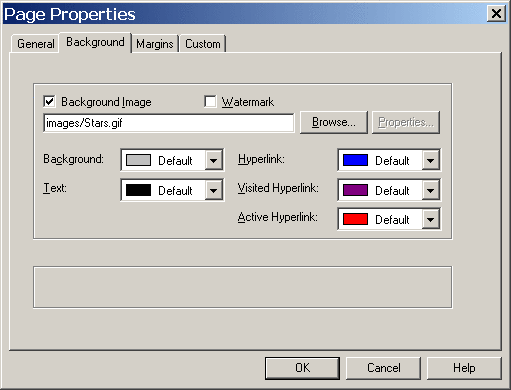
then check "Browse Image", then click the "Browse" button and select the image, then "OK". The background on your page should now change to the selected image.
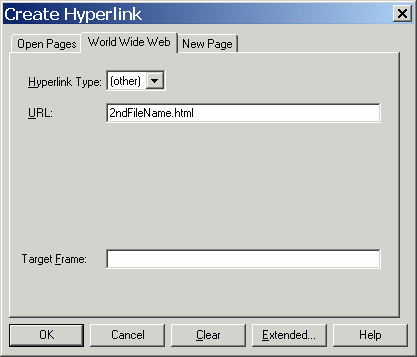
In this scenario, I am pointing to the page "2ndFileName.html", which I haven't even made yet. There's two ways to do this. You can make all the pages, then put them together later as then you would know all the file names, or you could do it step by step and make up a file name before you have even made the page for it yet; thats the easier way. Keep in mind, it is case sensitive. 2ndfilename.html isn't the same, nor is 2ndFileName.HTML. Every character should match exactly. Note: In this example, I am assuming you are going to save all your webpages you make in your Website folder and not any of them in any subfolders. To keep it simple, I would recommend storing any pictures to be used on the website in the subfolder, "images", as talked about previously, and any of the html pages I make I would store directly in the "Website" folder.
![]()
The "Target Frame" box should be left empty if
you're linking to one of your own pages. Many people will type
the word "blank" or "_blank" in it to force
the viewer's browser to open up a second window. This is usually
used only on hyperlinks that are directed at someone else's page.
But some people like for a new window to open up no matter what.
And some people prefer to use a single window throughout their
entire site, even when clicking on links to other sites. So
leaving it empty will make the viewer's browser open that
hyperlink in the same window and putting in the word
"blank" or "_blank" will cause another
browser page to be opened when someone clicks the link.
Note: When making a link pointing to ANOTHER website, you need to
put the entire path in and not just the filename.html. Example:
If I wanted to put a hyperlink to the search engine, google.com,
I would put this in: http://www.google.com
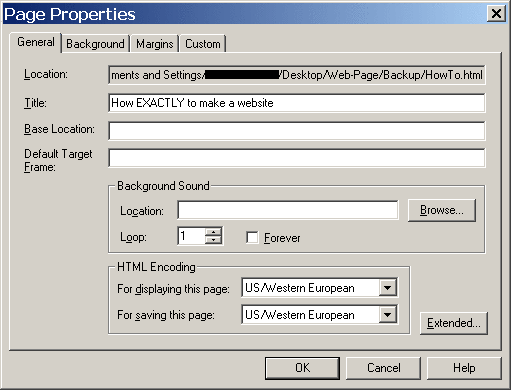
It's also possible to set the Target Frame so that, automatically, ALL the links on that page will open in a different window. Click "File", then "Page Properties". And enter either "blank" or "_blank" (Without the quotation marks) into the space marked "Default Target Frame". The difference between the two commands are that with 'blank", you click another page's link and a window opens up. But when you click on another foreign link, it loads in that same window. With "_blank", every single foreign link you click on will open up a different window.
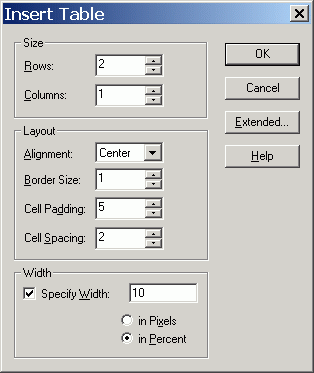
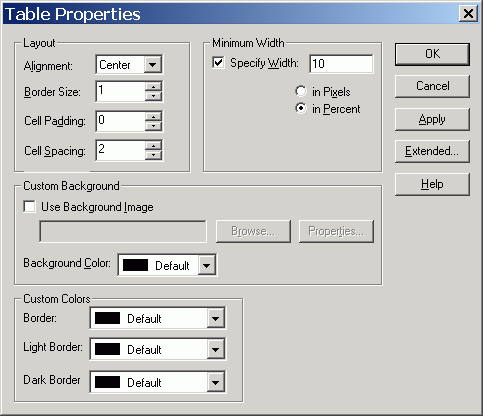
Set the rows to "2" and columns to "1". Make the width really narrow, like 10%. The reason is, an image will "stretch" the table width to make the table the same width as the image. Then when the words are entered, they can go no farther on each side as the width of the table, which is now the exact width of the image. When done, the image can be inserted into the top row and the words into the bottom. I would keep the cell padding on "0" for this particular use. The cell padding is the distance kept between what's entered into the table and the inside of the border. Everything else regarding tables and cells is pretty self explanatory. (The cells, in this case, are the two "rows") You can always change the properties by right-clicking on the table and selecting either "Table Properties" or "Cell Properties".
When using tables for other uses, such as to put a paragraph in, many people make the mistake of selecting "Pixels" and then entering the width to be wider than the monitor resolution. Remember, people who view your site might have their computer's resolution set to something different than you do. That's why I usually just use the ""Percent" setting.
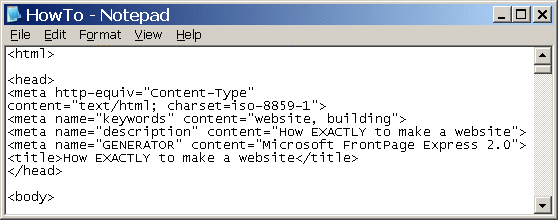
When I enter the meta tags, I will just right-click on the
HTML document that I want to insert them into and then select
"Open With", then "Notepad". Copy and paste
the following text somewhere between the <head> and
</head> lines as it is above. (Though the page title can
also be entered by selecting "File" and then "Page
Properties")
<meta name="keywords"
content="Enter the words most
associated with this particular web-page here">
<meta name="description"
content="Enter a brief description of
this particular web-page here">
<title>Enter the page title here</title>
To save it back into an HTML type of file and not as a text file
you select "File", "Save As"
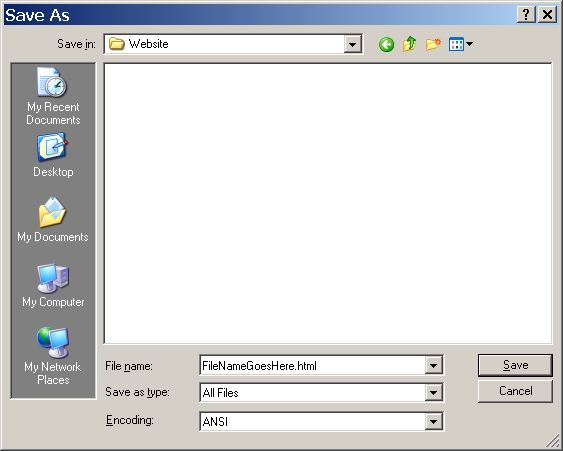
Click the down arrow by the "Save as type" box,
select "All Files" and above that you enter the
document name. You have to add the ".html" or else it
will save it as a ".txt" file type.
This method of editing HTML documents comes in handy when you are
working with scripts, as this particular HTML editor does not
recognize most of them and so you have to add the scripts in
after you get done making the page. (For those who don't know,
scripts are mostly just fancy stuff for web-pages. They are not
really needed to create a website. But they're fun afer you get
the hang of it.) Click here to see some
script code at work. (Only veiwable using Internet Explorer) Go
to http://www.24fun.com
to see all the rest, some of which will work on Netscape but
generally, most willl only be viewable using Internet Explorer. Here's one that works on IE5x/6x and
NS6x/7x, and to a lesser degree on Opera7x and NS4x.
To be continued . . . .